WELCOME TO RAEIMA'S PASSION
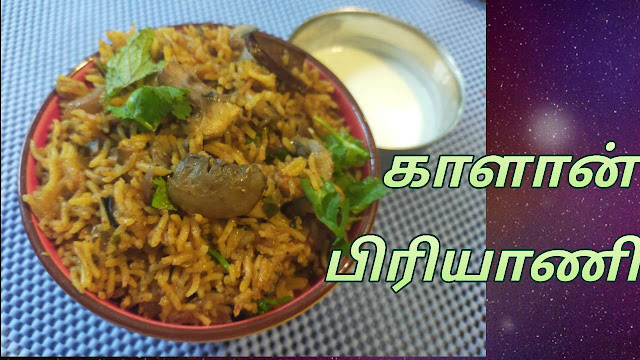
Mushroom Biriyani is an excellent alternative for chicken biryani. It is my daughter's favorite recipe, and I used to make both Mushroom biryani with coconut or without coconut recipes and serve with carrot raita/cucumber raita/onion raita for her lunch box. She loved it. Mushroom biryani with coconut recipe is almost similar to Mushroom biryani without coconut except for the Masalas. We need to more care to roast the coconut part in the masalas section. If coconut is over-roasted or dark brown, the biryani taste will be bitter and not good. So be alert.
In my childhood days, I never heard and saw the mushroom. The first time, In my college hostel, I tasted mushroom gravy with veg idly. Hmm! The taste was like the mutton gravy and outstanding. Ha! Ha! That day itself; I am the first person in the hostel dining hall for all Thursdays😉. Yes, they make mushroom gravy with veg idly on all Thursdays.
Now I am in Netherland, their mushroom is a very cheapest and easy to access with many health benefits, such as
- It is Fat-free, Low calorie, Low cholesterol.
- It helps to support the immune system and prevent damage to cells and tissues.
- It may help protect against cancer.
- It may help to maintain heart health.
Nowadays, we had a mushroom in the weekly once and made different recipes such as
- Simple Mushroom Fry
- Mushroom Biriyani without Coconut
- Mushroom Pepper Fry
- Mushroom Gravy
- Mushroom Soup
- Mushroom Sandwich
- Mushroom Stuffed Sandwich
- Garlic Mushroom Fry
- Mushroom Omelette
For more info about my blog, please go through the below links:
Ingredients:
- Fennel seeds - 1 1/2 tsp
- Red chilies - 7 nos
- Biriyani leaves - 3 nos
- Cloves - 4 nos
- Cinnamon stick - 2 inch
- Star anise - 1 no
- Coconut oil - 1 tsp
- Ghee - 2 tsp
- Shredded coconut - 1 tbsp
- Pepper - 1 /2 tsp
- Coriander powder - 1 tsp
- Coriander leaves -1 handful
- Mint leaves - 1 handful
- Basmati rice - 2 cup
- Water - 2 1/2 cup
- Mushroom - 250 g
- Salt - as required
- Turmeric powder - 1/2 tsp
Please press the below link of video format in Tamil language and caption in the English language.
How do you make a Mushroom Biryani with coconut?
Step 1: First Dry roast the masalas. It is a crucial part of this recipe. If coconut is over-roasted or dark brown, then the entire recipe will be a bitter taste. So be alert. Roast the 1 1/2 tsp fennel seeds, 7 red chilies, 2 biryani leaves, 1-inch cinnamon stick, 2 nos cloves, 1 tbsp coconut, 1/2 tsp pepper seeds, and 1/2 tsp coriander powder up to light brown color then grind the masalas once it's cool.
Step 2: Add 1 tsp coconut oil to the cooker.
Step 3: Add 2 tsp ghee to the cooker.
Step 4: Roast the masalas (2 nos cloves, 1no biryani leaves, 1 no star anise, 1-inch cinnamon stick, 1/2 tsp fennel seeds) in the cooker.
Step 5: Add the chopped 1 onion in a vertical wise and 2 green chilies on the cooker and saute well until the onion change to translucent.
Step 6: Add 1 tsp ginger garlic paste on the cooker and saute well until the raw smell goes off.
Step 7: Add chopped 1 tomato in a vertical wise to the cooker and saute well until it's changed into a mushy substance.
Step 8: Add one handful of coriander leaves and mint leaves to the cooker.
Step 9: Add a chopped 250 g mushroom in a vertical wise to the cooker and saute well up to five to seven minutes until the water releases from the mushroom.
Step 10: Add the grind masalas to the cooker and saute well.
Step 11: Add 1/2 tsp turmeric powder to the cooker.
Step 12: Soak the 2 cups of basmati rice with water for 30 minutes then add it to the cooker.
Step 13: Add water to the cooker based on a 1: 1 1/4 cup ratio (Rice: Water). Now I add 2 cups of rice so I added 2 1/2 cups of water and mixed well.
Step 14: Add the required salt to the cooker and mix well.
Step 15: Close the lid and wait for one whistle or 10 minutes.
Step 16:Now open the lid. Wow, a tasty biryani is ready. Serve with coriander leaves.


Comments
Post a Comment